
I hand-code my links. Oh, I tried Blogrolling.com for a while (and I still have a "Blogroll Me!" link in the sidebar) but I soon grew tired of it; having to do this over a dialup connection is irritating enough without also having to depend on a distributed service to do it, and the generated blogrolls have far, far too little leading between the lines and I don't know how to control it. And I'm designer enough that I detest not having that control.
In an assignment in school I opined that "I abhor settling for defaults". And it's true, but perhaps is better said that I hate defaults but put up with them when I must. I'm still not clear on how to control the leading in a Blogger template (the somewhat-ubiquitous Minima Black, for what that's worth) but I'm working on garnering that little bit of knowledge.
That digression aside, it's important to do some things like this by hand. You don't have to, of course, and programs like Amacrodobemedia DreamWeaver make it entirely optional (not to mention MS Front Page, which we shall no longer do this missive). The benefit of doing things by hand is that it just plain makes you smarter. Go ahead, use your browser and calll up a source display of this page. How soon do your eyes glaze over? If you hand code links and fix little things that way, I'm betting it's not as soon. Drop yourself into a situation where you have to fix HTML in a text-editor (even I once hand-coded a web page in MS Notepad...Notepad, for God's sake!) and you're less likely to freak out.
You'll be the web-version of MacGyver, or as near as everyone else will think you a miracle worker. Know the code!
My usual loquaciousness aside, here's the nut of it, based on my Blogger experience.
The Basic Link Tag
If you go Blogger and open up a brand-spankin' new 'blog, in the template's sidebar, you usually get three links as standard equipment:
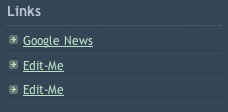
The first link's destination is obvious. The next two go essentially nowhere, and suggest what you need to be doing with them.
The sidebar hyperlink is a case of what is called the anchor tag. An anchor tag is any tag which begins with "<a>;" and end with "</a>". Anchors form targets for you to aim and and places for your browser to land in your HTML. A hyperlink from anywhere to this 'blog (naked hint, people!) looks like this:
<a href="http://zehnkatzen.blogspot.com">The Zehnkatzen Times</a>
For the curious, here's a dissection:
Placing the Missing Link
Now that you know how to code the basic hyperlink anchor, here's the skinny on how you do it on Blogger.
We'll assume you've just created a 'blog at this point. Go now to the Dashboard (if you're signed in to Blogger, just typing the URL will get you there...hell, bookmark this whilst you're at it), click on the name of the blog to bring up the blog's main posting page, and then click on the Template tab to see the actual HTML guts of your blog.
Suit up, Dave; we're going in. Open the pod bay doors, Hal; we're going under the hood.
In the window in the middle, scroll down. You're looking at naked HTML blended with Blogger's own tag code (that's the tags with the big-money ($) inside, amongst others). Scroll down slowly until you see the following comment:

Three links; one to Google News, and two to Blogger's own help on how to edit this. The structure of the hyperlink anchor tags themselves should now be fairly obvious, and how to change them to point to where you want them–and how to customize the text–should be fairly obvious as well. This is where you hand-build your own blogroll, where you take control of the sidebar.
A few further tips and cautions:
Stay tuned, I'll detail how I did this in the very near future.
Part 2, concerning adding images to your links, can be viewed here.
Technorati Tags: Bogger, blogging, template, Blogger how-to, HTML coding
- <a opens the tag, the "a" tells us this is the beginnng of an anchor.
- href specifies the kind of anchor this is; href means "hyperreference" and requires that you specify a URL.
- "http://zehnkatzen.blogspot.com" is, the URL you're pointing at, naturally. Nota bene the quotes surrounding the URL; in earlier HTML versions these were optional. The standard is evolving; in the future, as the standards become stricter, they will be required, and if standards-compliance is important to you, they need to be there.
- The next > closes the front of the tag.
- Any text can go next, of any length, but you want it to be descriptive, so The Zehnkazten Times it is.
- And lastly, </a> to close the whole tag, like a closing parenthesis. If this is left off, the browser will intepret everything to the next </a> as part of the link. Your browser (and your blog) will look and act pretty funny.
Placing the Missing Link
Now that you know how to code the basic hyperlink anchor, here's the skinny on how you do it on Blogger.
We'll assume you've just created a 'blog at this point. Go now to the Dashboard (if you're signed in to Blogger, just typing the URL will get you there...hell, bookmark this whilst you're at it), click on the name of the blog to bring up the blog's main posting page, and then click on the Template tab to see the actual HTML guts of your blog.
Suit up, Dave; we're going in. Open the pod bay doors, Hal; we're going under the hood.
In the window in the middle, scroll down. You're looking at naked HTML blended with Blogger's own tag code (that's the tags with the big-money ($) inside, amongst others). Scroll down slowly until you see the following comment:
<!-- Begin #sidebar -->You're almost there. Look very carefully, now, and in a handful-or-so of lines you'll see the following HTML, which rendered the display seen above (it's a screenshot-click on it to enlarge it):

Three links; one to Google News, and two to Blogger's own help on how to edit this. The structure of the hyperlink anchor tags themselves should now be fairly obvious, and how to change them to point to where you want them–and how to customize the text–should be fairly obvious as well. This is where you hand-build your own blogroll, where you take control of the sidebar.
A few further tips and cautions:
- The link list is contained inside something called an unordered list, defined by the <ul> ... </ul> tags. Each item in the list is delmited by the <li>...</li> tags. The basic user should leave these alone, but once you understand them, you can open sections on your blogroll organized by theme, as I've done here.
- A quick way to save a step in generating further items for your blogroll is to simply copy the last line in your current list, paste it right back in below the last line, and change what needs to be changed.
- Something one ought to do, if one is playing on the template code level, is to save a copy of your template. We all make mistakes, and one common one, from tyro to guru, is clobbering your entire template, perforce sending it off to alphabet heaven, never to return. Click in the editing window, select all (CTRL-A Wintel, CMD-A Mac) copy, open a basic text editor, paste, and save it as plain ASCII. If you hose your template beyond all rescue, open the saved text file, and copy and past it back in. You'll thank me.
Part 2, concerning adding images to your links, can be viewed here.
Technorati Tags: Bogger, blogging, template, Blogger how-to, HTML coding
No comments:
Post a Comment