
2284Dig, if you will, this picture:
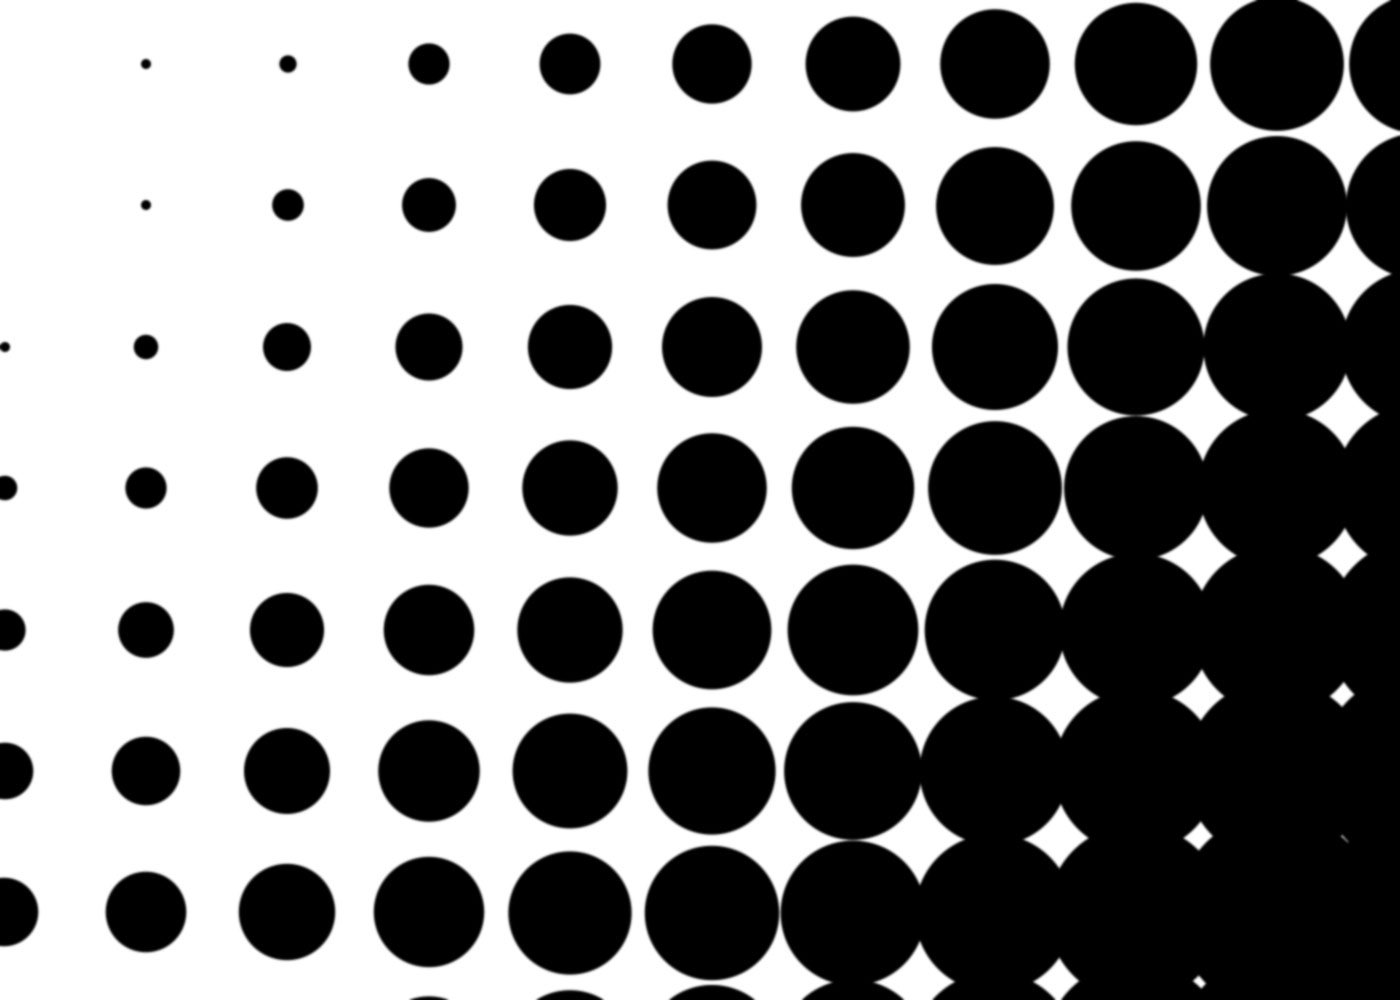
Nifty, yes, You can picture using this for background texture for a funky bit of photoshopping, some sort of retro touch to a design. Well, this is what I call a big-dot halftone, and I can show you how to make it quickly and easily, and it involves alpha channels, which mean you can use it in a dozen-and-one ways, just as a selection.
That's why alpha channels are awesome. You should know about them.
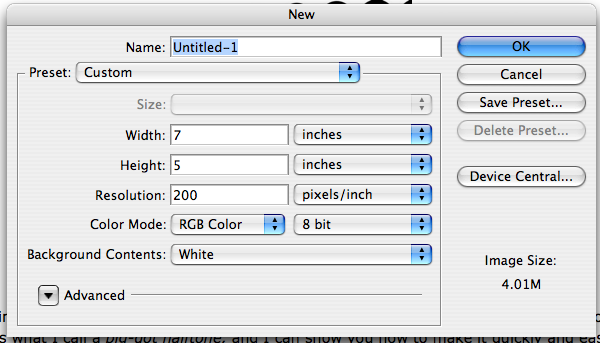
First thing you do, in this case it will be sufficient to open Photoshop (I use CS3) and create a standard photoshop document (I just used 200ppi for no particular reason. Use whatever suits you, though more than 100ppi would probably be better for experimenting, and once you get the hang of it, play with settings):
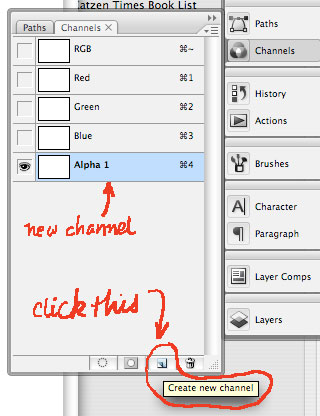
Second thing you do is to create an alpha channel. To do this, go to the Channels panel and click it to open. The standard documents just have (in the RGB case) the Composite RGB channel, and the R, G, and B channels separate. Click on the "new channel" button on the bottom and the channel will be created and automatically named "Alpha 1" and autoselected (rename the channel if you wanna).
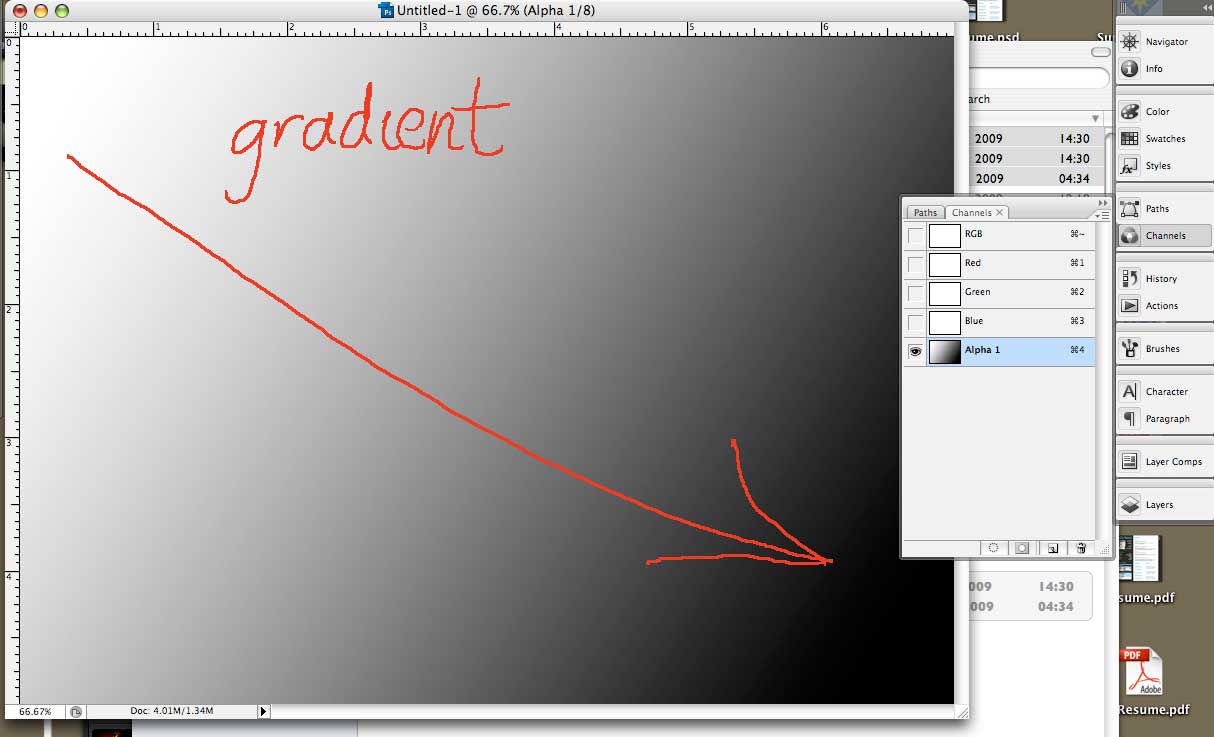
Third thing you do is create a gradient in this alpha channel. I took a linear gradient and just swept it whatever-which-way I felt at the moment.
Fourth thing you do is where we start to get to the meat 'n' tatoes of the thing. While still in your alpha channel, Call up Filters > Pixelate > Color Halftone from the menu dropdowns. You'll get this:
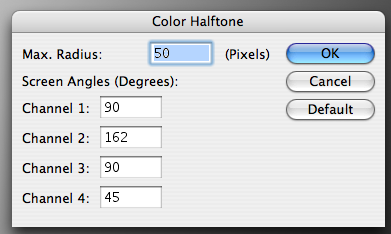
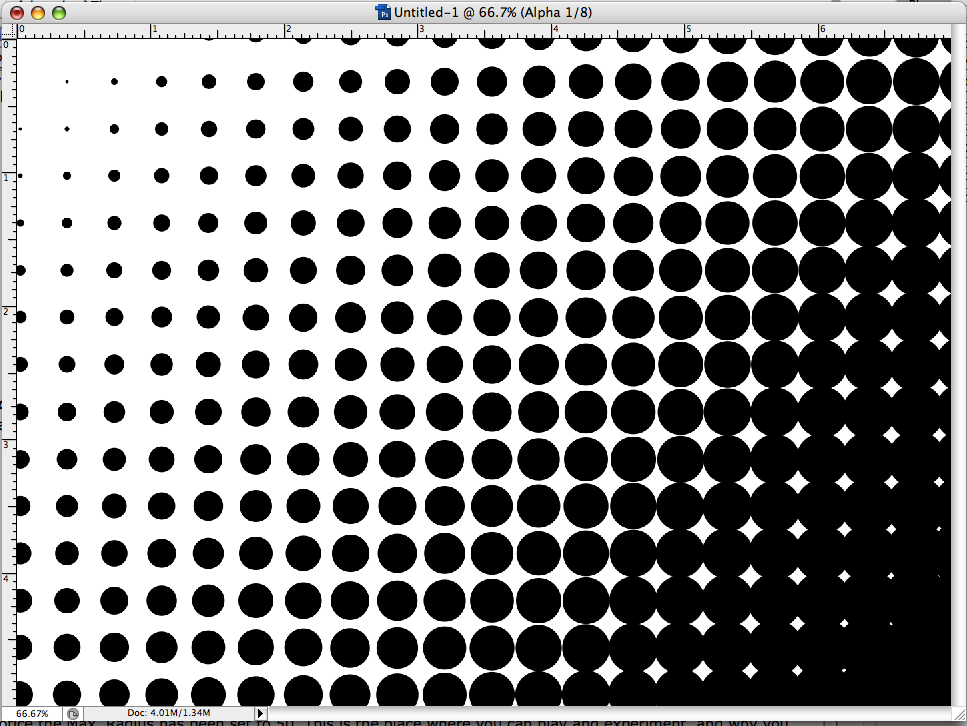
Notice the Max. Radius has been set to 50. This is the place where you can play and experiment, and why you might want to have an eye toward how many ppi's are in your document. But for now, just follow along. Another important thing to notice here is that the screen angles here can be specified for all four channels, but recall when working with black and white only, the only one you have to worry about it Channel 1. I want a up-and-down, horizontal-vertical screen of halftone dots, to I set the Channel 1 screen angle to 90 degress. Here's what I get when I apply the above settings to my alpha channel gradient:
Now, remember this is still alpha channel. It's true that you can do the same sort of thing on the actual PSD by invoking the Color Halftone dialog, selecting the color or channel and invoking that that way, but by doing it in the alpha channel you have that thing that Photoshop makes so very profitable – a saved selection. You know the basic Photoshop workflow - select it and affect it. Well, here you have the selection locked in. Now, by dragging the alpha channel to the Create Selection button on the Channels panel, you have instantly created a selection that you can grow, choke off, fill with whatever color you want. It allows more creative power.
Now you have a way to use gradients, alpha channels, and selections to make funky effets for fills, backgrounds, or whatever. But you can also kick this up to the next level. As you've probably deduced, the rate of dot growth depends on the steepness of the gradient, how close to white the white end is, and how close to black the black end is. And there's more than one way to create a gradient, of course, and by that, I mean make a selection and blur. I've seen other Photoshoppers and tutorial authors do this, and I'll show you how I'd carry this out.
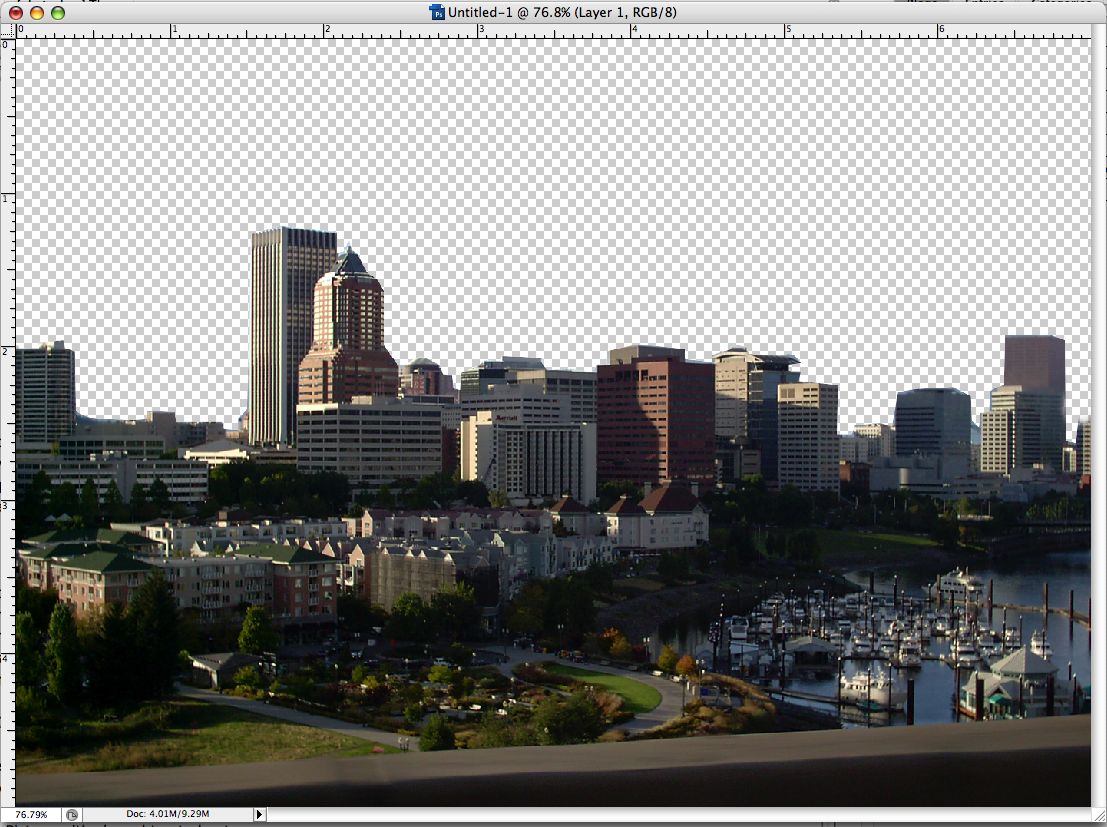
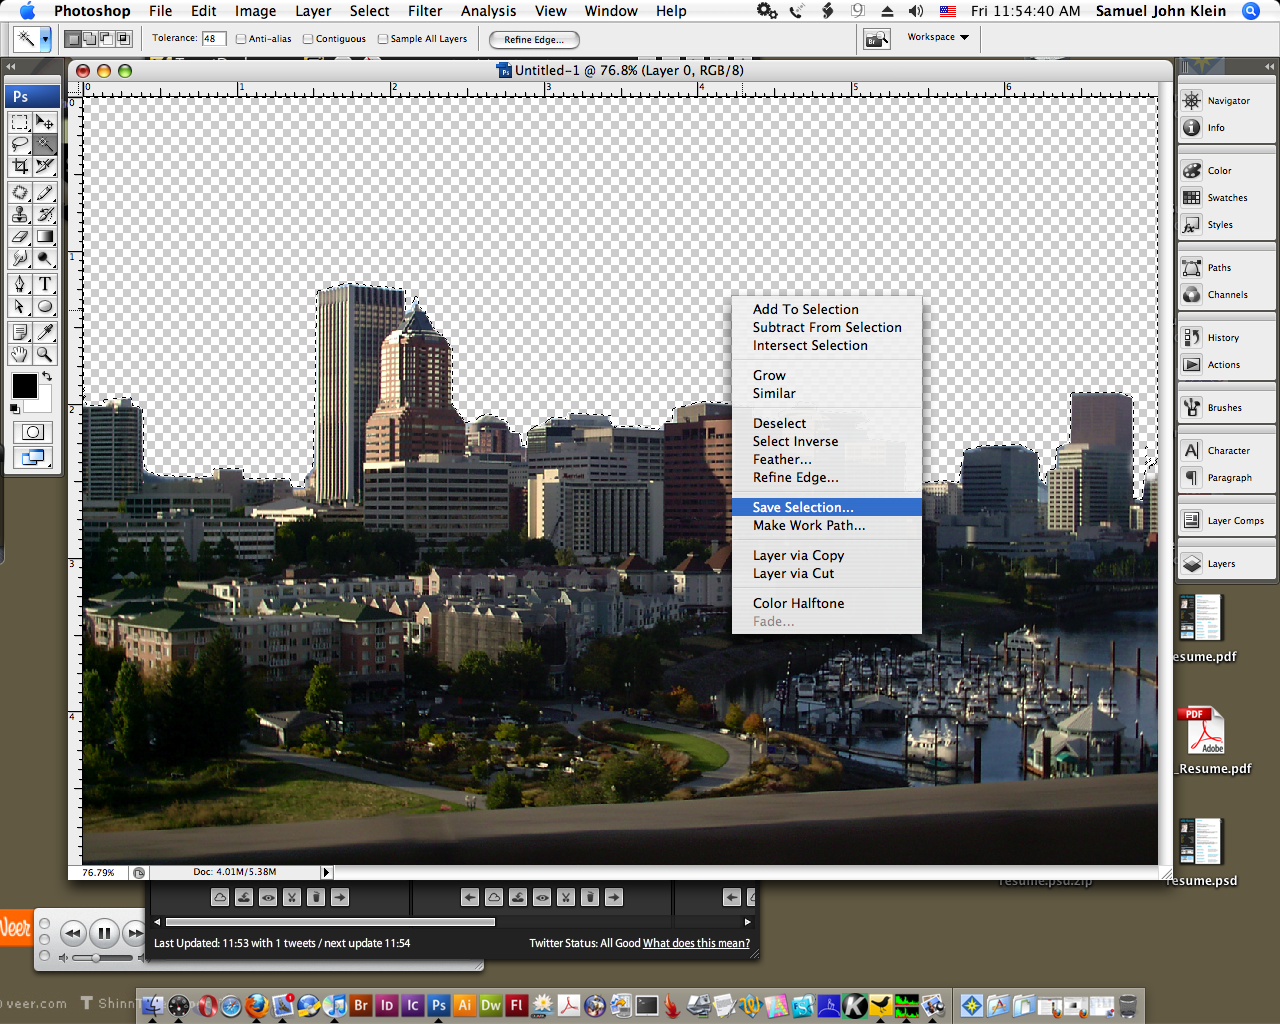
First, get a neat shape you want to decorate. I took one of my favorite pixs and used a path to create a selection that subtracted out the sky and made that clear area a selection. Then, I created an alpha channel with that selection by CTRL-clicking (or right-clicking) to make the screen menu come up, then selecting "Save Selection" to create an alpha channel out of that selection:
1. Picture with sky subtracted out:
2. Selecting the clear area and creating a selection:
3. The alpha channel created:

Now, to create the gradient with blur. To that, we turn to the Photoshopper's best friend, Gaussian blur (how did with ever get along without this genius bit of code?) I appled Gaussian blur to the whole channel and played with the pixel radius until I got something that struck me as close enough for jazz, which, as it happened, looked like this:
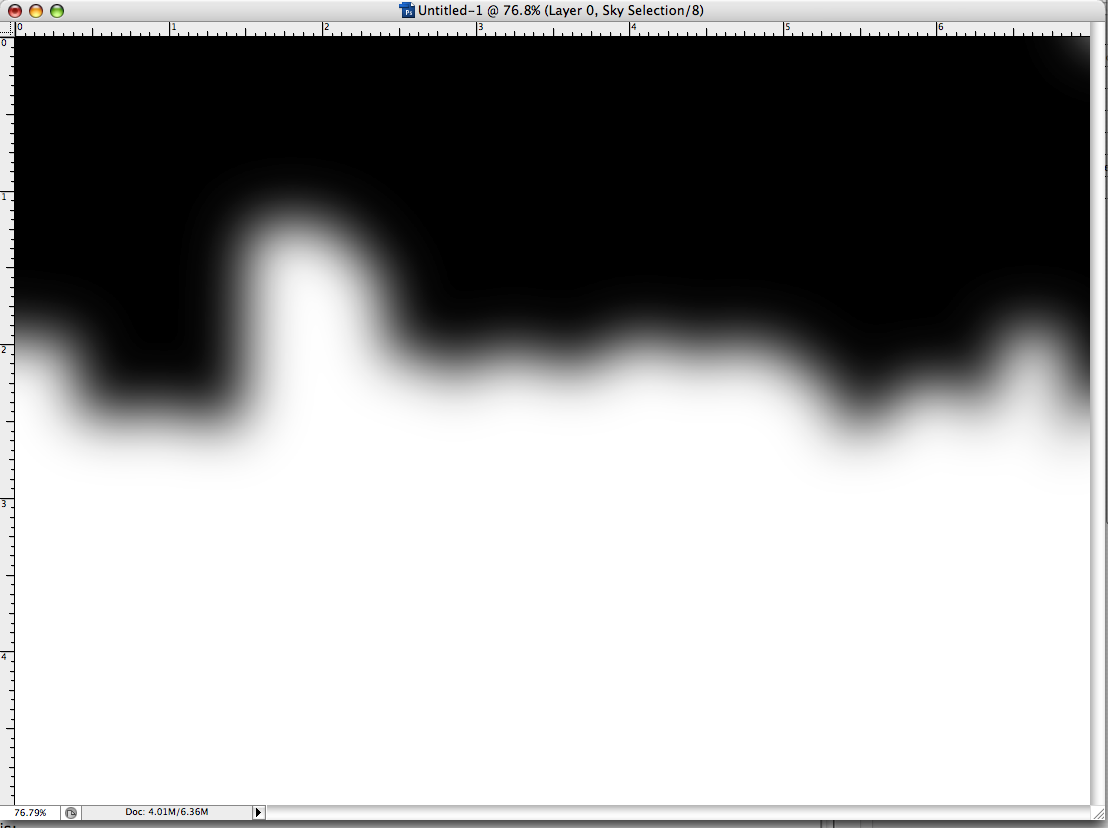
I just went with this, knowing I could use the History panel to dial back and try again. It's play time!
Now, the moment of truth! Using the same Color Halftone settings as before, but reducing the Max Radius to 15 px (I didn't want them too chunky), I got this:
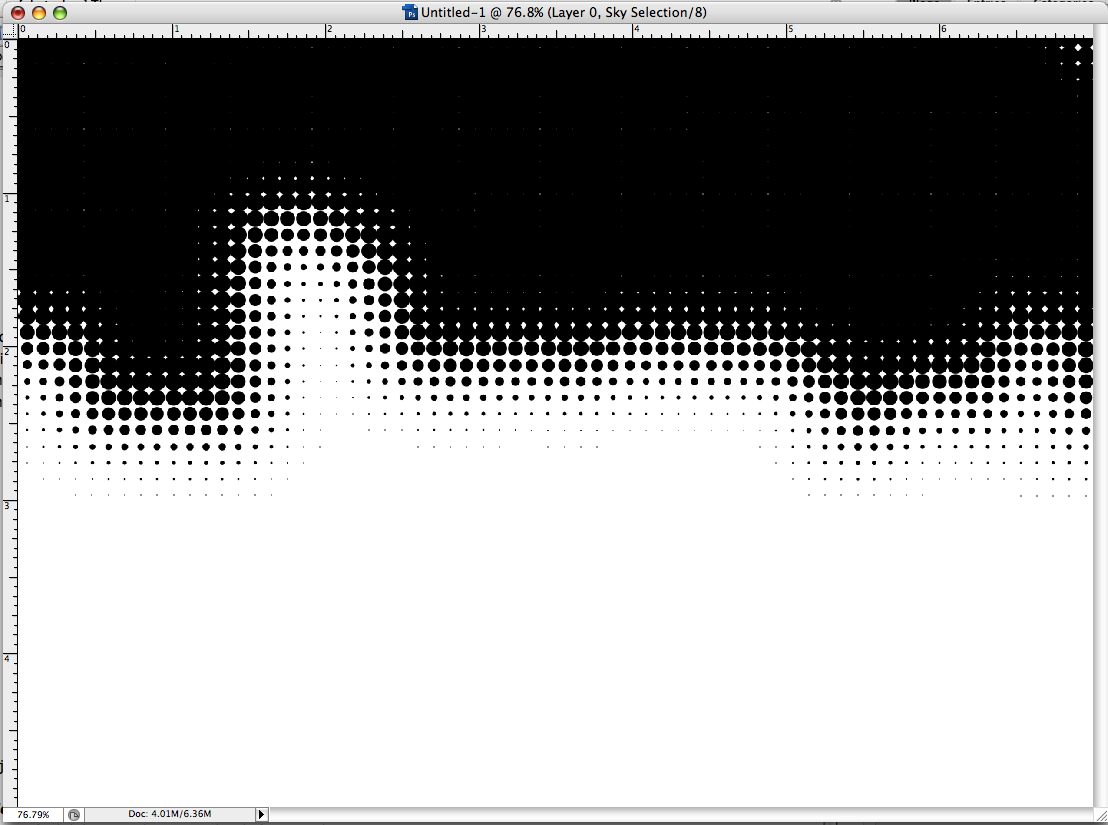
This is looking promising. My alpha channel is good to go, the selection info done and saved. Now, going back to the full composite channel, I create another layer and make sure it's behind my layer with the picture in it. Returning once again to the Channels panel, I drag the alpha channel to the "Create Selection" button, and fill that selection with a nice-yet-unnatural blue tone. That was the journey, this was the destination:
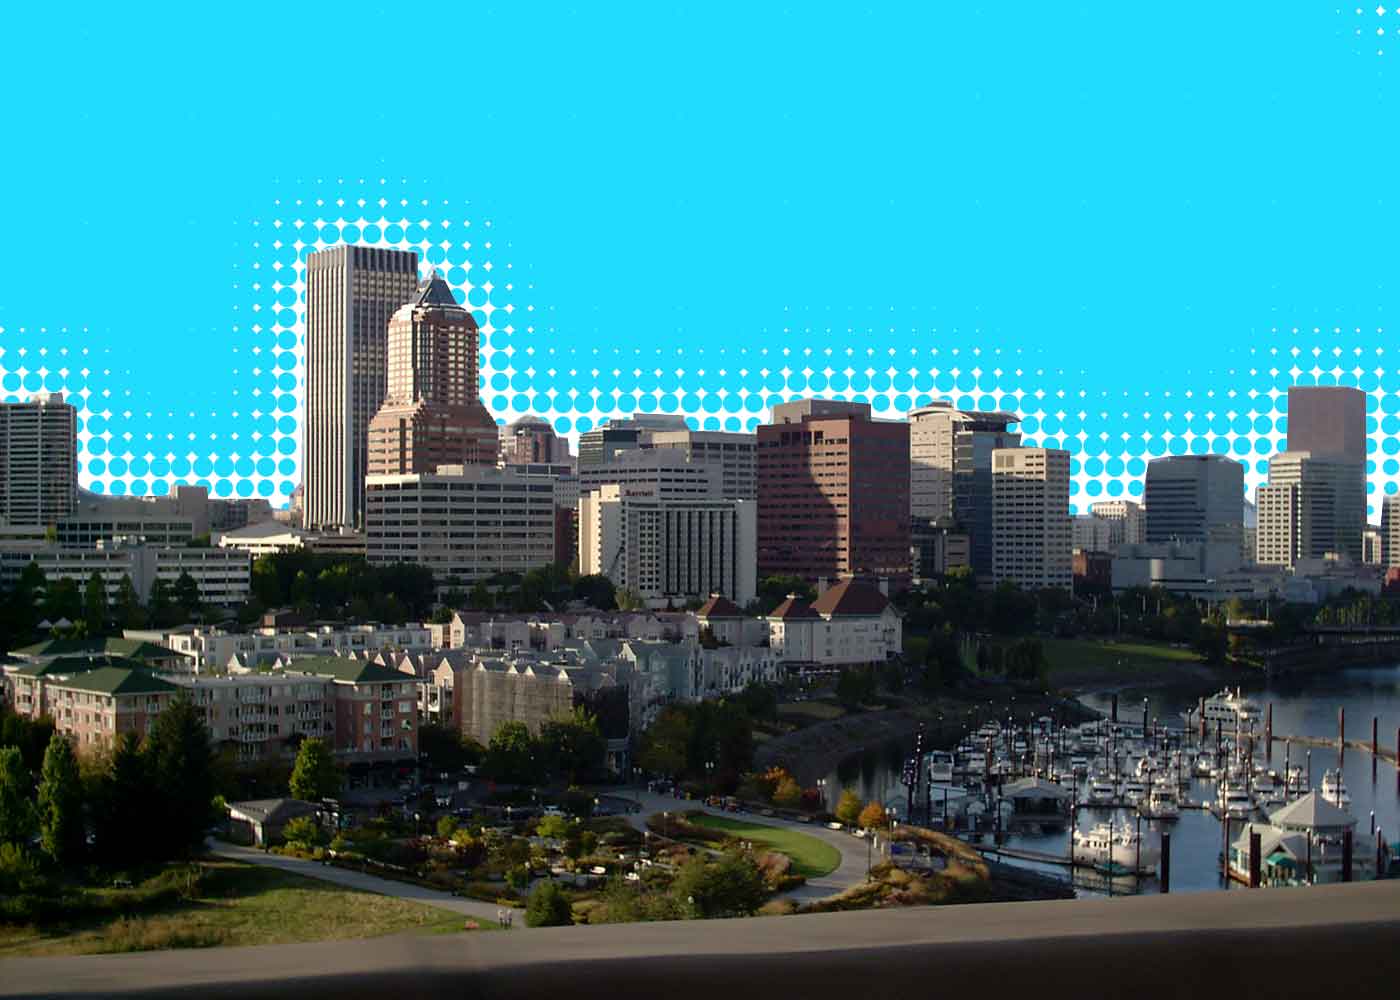
Funky? You bet. This stuff's just looking to be made into one of those black-light-flock posters. True, that. Contact this blogger if you're looking for the rights to do just such a thing.
Technorati Tags: photoshop, halftone, big dot halftone, alpha channels, photoshop cs3
Nifty, yes, You can picture using this for background texture for a funky bit of photoshopping, some sort of retro touch to a design. Well, this is what I call a big-dot halftone, and I can show you how to make it quickly and easily, and it involves alpha channels, which mean you can use it in a dozen-and-one ways, just as a selection.
That's why alpha channels are awesome. You should know about them.
First thing you do, in this case it will be sufficient to open Photoshop (I use CS3) and create a standard photoshop document (I just used 200ppi for no particular reason. Use whatever suits you, though more than 100ppi would probably be better for experimenting, and once you get the hang of it, play with settings):
Second thing you do is to create an alpha channel. To do this, go to the Channels panel and click it to open. The standard documents just have (in the RGB case) the Composite RGB channel, and the R, G, and B channels separate. Click on the "new channel" button on the bottom and the channel will be created and automatically named "Alpha 1" and autoselected (rename the channel if you wanna).
Third thing you do is create a gradient in this alpha channel. I took a linear gradient and just swept it whatever-which-way I felt at the moment.
Fourth thing you do is where we start to get to the meat 'n' tatoes of the thing. While still in your alpha channel, Call up Filters > Pixelate > Color Halftone from the menu dropdowns. You'll get this:
Notice the Max. Radius has been set to 50. This is the place where you can play and experiment, and why you might want to have an eye toward how many ppi's are in your document. But for now, just follow along. Another important thing to notice here is that the screen angles here can be specified for all four channels, but recall when working with black and white only, the only one you have to worry about it Channel 1. I want a up-and-down, horizontal-vertical screen of halftone dots, to I set the Channel 1 screen angle to 90 degress. Here's what I get when I apply the above settings to my alpha channel gradient:
Now, remember this is still alpha channel. It's true that you can do the same sort of thing on the actual PSD by invoking the Color Halftone dialog, selecting the color or channel and invoking that that way, but by doing it in the alpha channel you have that thing that Photoshop makes so very profitable – a saved selection. You know the basic Photoshop workflow - select it and affect it. Well, here you have the selection locked in. Now, by dragging the alpha channel to the Create Selection button on the Channels panel, you have instantly created a selection that you can grow, choke off, fill with whatever color you want. It allows more creative power.
Now you have a way to use gradients, alpha channels, and selections to make funky effets for fills, backgrounds, or whatever. But you can also kick this up to the next level. As you've probably deduced, the rate of dot growth depends on the steepness of the gradient, how close to white the white end is, and how close to black the black end is. And there's more than one way to create a gradient, of course, and by that, I mean make a selection and blur. I've seen other Photoshoppers and tutorial authors do this, and I'll show you how I'd carry this out.
First, get a neat shape you want to decorate. I took one of my favorite pixs and used a path to create a selection that subtracted out the sky and made that clear area a selection. Then, I created an alpha channel with that selection by CTRL-clicking (or right-clicking) to make the screen menu come up, then selecting "Save Selection" to create an alpha channel out of that selection:
1. Picture with sky subtracted out:
2. Selecting the clear area and creating a selection:
3. The alpha channel created:
Now, to create the gradient with blur. To that, we turn to the Photoshopper's best friend, Gaussian blur (how did with ever get along without this genius bit of code?) I appled Gaussian blur to the whole channel and played with the pixel radius until I got something that struck me as close enough for jazz, which, as it happened, looked like this:
I just went with this, knowing I could use the History panel to dial back and try again. It's play time!
Now, the moment of truth! Using the same Color Halftone settings as before, but reducing the Max Radius to 15 px (I didn't want them too chunky), I got this:
This is looking promising. My alpha channel is good to go, the selection info done and saved. Now, going back to the full composite channel, I create another layer and make sure it's behind my layer with the picture in it. Returning once again to the Channels panel, I drag the alpha channel to the "Create Selection" button, and fill that selection with a nice-yet-unnatural blue tone. That was the journey, this was the destination:
Funky? You bet. This stuff's just looking to be made into one of those black-light-flock posters. True, that. Contact this blogger if you're looking for the rights to do just such a thing.
Technorati Tags: photoshop, halftone, big dot halftone, alpha channels, photoshop cs3
4 comments:
Your information here is quite exhaustive. An alpha channel is a type of mask. In alpha channels, selected pixels are white, black pixels are unselected, and anything in between is partially selected or partially unselected depending on whether you think the glass is half full or half empty.
That's quite correct and I'm glad you said that. After graduating from programs like Paint to work on the big-boy level of Photoshop, though, alpha channels were such a strange thing that I adopted the "saved selection" metaphor in order to keep the concept "nailed down" as it were.
You're exactly correct about the "half full/half empty" thing. As an example, if I simply saved that gradient as an alpha channel then the "saved selection" would be varying across the gradient; the white areas would have no pixels selected (if the channel would make a selelction) and more and more of the pixels would be selected the more toward black the gradient went, until all pixels were selected in that area.
great tutorial! It's very usefull for me as newbie.. Thanks a million!
Thank you - exactly what I was looking for and I'm using Photoshop Elements and it was very easy to follow.
Post a Comment